Friday, September 2, 2011
I almost forgot... *a change to Quick Roasted Chicken & Potatoes*
I made the Quick Roasted Chicken & Potatoes 2 weeks ago, and I was too, ahem, lazy to cut out the backbone and all the other stuff - it really didn't make a substantial difference in the cooking time - so DON'T do it because it is a huge waste of time! I've changed the recipe to reflect this!
Grilled Chicken Fajitas

Yikes! Where have I been? But, rest assured, I will always come back to share my culinery adventures with you! As I write, my mixer is providing me with some background noise as it blends together a cupcake concoction! I am finally able to think about cupcakes without getting dry heaves - what a miracle! For 9 months of pregnancy I was not able to even think about making one, and now, as both babies sleep, and I should be sleeping, I am making cupcakes instead.
But enough about cupcakes, because as fall is approaching I need to share with you a recipe to give your BBQ one last hurrah! I have made these almost once a week this summer; that's how great they are. So, because it is a fine summers day, with a hint of fall in the air at nights, pull out the BBQ, blend up some margaritas and grill up some smoky fajitas!
Grilled Chicken Fajitas
Ingredients:
1/3 cup freshly squeezed lime juice
4 tbsp. vegetable oil
3 cloves garlic, minced or pressed
1 tbsp. Worcestershire sauce
1½ tsp. brown sugar
1 jalapeño, seeded, ribbed and diced
1½ tbsp. minced fresh cilantro
1 tsp. salt
¾ tsp. pepper
2-3 boneless, skinless chicken breasts
1 large red onion, sliced
2 large bell peppers, sliced
8-12 (6-inch) flour tortillas
Directions:
In a medium bowl, whisk together the lime juice, vegetable oil, garlic, Worcestershire sauce, brown sugar, jalapeño, cilantro, salt and pepper. Reserve ¼ cup of the marinade; set aside. Place the chicken breast in the marinade, cover with plastic wrap and refrigerate for 15 minutes. In a bowl, toss remaining marinade with onions and peppers and then season with salt and pepper.
In a medium bowl, whisk together the lime juice, vegetable oil, garlic, Worcestershire sauce, brown sugar, jalapeño, cilantro, salt and pepper. Reserve ¼ cup of the marinade; set aside. Place the chicken breast in the marinade, cover with plastic wrap and refrigerate for 15 minutes. In a bowl, toss remaining marinade with onions and peppers and then season with salt and pepper.
Place chicken on BBQ, and the veggies in a well oiled metal baking dish on the grill as well - keep an eye on the veggies as they will char quickly if unsupervised!
When the chicken is cooked through, let cool for several minutes before slicing. Warm up the tortillas, pile on the chicken and veggies and sprinkle cheese and sour cream over top. Sooo yum!
Source: Cooks Illustrated, via Annie's Eats
Tuesday, August 9, 2011
Coffeecake Muffins

These muffins are fantastic, so fantastic in fact that from where I sit, I have pretty much been imagining, all morning, biting into one of these, right out of the oven, smothered in butter. Instead, as I write this, I have a cold cup of tea and two digestive cookies as my breakfast companions. Oh the irony! And, seeing as how it is another BC summery day of overcast clouds and the possibility of rain, I think you should make these this afternoon to enjoy with a cup of hot tea... all I ask is that you think of me while you take the first delicious bite!
Coffeecake Muffins
(Yields 12-15 muffins)
1/4 cup packed brown sugar
1 teaspoon ground cinnamon
2 cups all-purpose flour
1 cup granulated sugar
1 teaspoon salt
1/2 cup butter, cut into 1/2" pieces and softened
1 1/2 teaspoons baking powder
1/2 teaspoon baking soda
3/4 cup sour cream
1 large egg
1 teaspoon vanilla extract
Directions:
Preheat oven to 350 degrees
Mix together brown sugar and cinnamon in a small bowl
Mix flour, granulated sugar, and salt. Sprinkle butter evenly over flour mixture and combine until butter is oat-sized and the mixture resembles cornmeal.
Remove 1 cup of the flour-butter mixture and stir with fork into reserved brown sugar mixture until combined to make streusel.
Set aside 3/4 cup pf streusel for muffin batter and remaining portion for topping muffins.
Add baking powder and baking soda to remaining flour mixture.
Whisk together sour cream, egg, and vanilla; add to flour mixture. Combine until batter is just moistened.
Add 3/4 cup reserved streusel to flour mixture and mix until just distributed throughout batter.
Divide batter among muffin cups and sprinkle with streusel, pressing lightly so that streusel sinks slightly into batter. Bake until toothpick inserted in center of muffin comes out with several crumbs clinging to it, about 18 minutes, rotating pan from front to back halfway through baking time.
Let cool on rack for several minutes, take muffins out and cool for about 5 more minutes. Smother with butter (if you are so inclined), and enjoy every delicious morsel!
Source: Baking Illustrated
Tuesday, July 26, 2011
DIY Oreos

DIY Oreos
Yield: about 20-24 sandwich cookies
Ingredients:
For the cookies:
1¼ cups all-purpose flour
½ cup unsweetened cocoa powder
1 tsp. baking soda
¼ tsp. baking powder
¼ tsp. salt
1-1½ cups sugar*
10 tbsp. (1¼ sticks) unsalted butter, at room temperature
1 large egg
For the filling:
4 tbsp. (¼ cup) unsalted butter, at room temperature
¼ cup vegetable shortening
2 cups confectioners’ sugar, sifted
2 tsp. vanilla extract
*The range of sugar called for here allows you to make these cookies as sweet as you like (or not). To make it closer to a store-bought Oreo, use 1 cup. For a sweeter cookie, use the full 1½ cups. I split the difference and used 1¼ cups.
Preheat the oven to 375˚ F. Line two baking sheets with silicone baking mats or parchment paper.
In a food processor or the bowl of an electric mixer, combine the flour, cocoa powder, baking soda, baking powder, salt, and sugar. Mix briefly to combine. Add the butter to the bowl and pulse or mix briefly to incorporate. Add in the egg and mix until the dough forms a cohesive mass.
Scoop a scant tablespoon of batter onto the baking sheet. (I used the Pampered Chef medium cookie scoop.) Continue scooping, spacing the dough balls a couple of inches apart. With moistened fingers, gently press down on the dough balls to flatten slightly. Bake for 9-11 minutes, rotating the pans halfway through baking. Transfer the baking sheets to a wire rack and let cool completely until the cookies are firm and set.
Be sure the cookies are completely cooled before filling.To make the filling, combine the butter and shortening in the bowl of an electric mixer. Beat on medium-high speed until smooth. Add the confectioners’ sugar to the bowl and mix on low speed just until incorporated, then increase the speed to medium-high and beat until light and fluffy, about 2-3 minutes. Blend in the vanilla extract.
To assemble the cookies, pair them up by size. Use a pastry bag fitted with a plain round tip to pipe a swirl of filling onto the flat side of one cookie of each pair. Sandwich together with the remaining cookie and press down so that the filling reaches the edges.
Source: annieseats.com who slightly adapted it from Smitten Kitchen, who adapted it from Retro Desserts by Wayne Brachman
Wednesday, July 20, 2011
Quick Roasted Chicken & Potatoes by Gwyneth Paltrow
I'm back! And seeing as how I have not done any cooking or baking in the last few weeks due to the arrival of a new little man in my life, I am actually going to blog about something I did not make. All credit is due to my lovely friend, and provider of meals, CCSR, and this one, even though I didn't make it, but just popped it in the oven, hit the spot! She told me it is super easy, and with two little ones in her house, I have to believe that what she says is true! So without further ado, I will introduce you to Gwenyth Paltrow's Quick Roast Chicken and Potatoes. It is truly sad that a roasted chicken is permissible as a meal during the height of summer, but really, with the weather we have been having soups and stews are fair game too! This was delish, and the flavors all melded together to make a scrumptious plethora of goodness. Plus, I was still picking at the leftovers a day later and may have even tried to eat it for dinner the next night.
Quick Roasted Chicken & Potatoes
Ingredients:
3 to 4 pound whole chicken
1 lemon, cut in half
6 garlic cloves, peeled
A few sprigs of fresh rosemary, sage and thyme (Superstore sells a Poultry Blend)
Coarse salt
Freshly ground black pepper
About 1/3 cup extra virgin olive oil
1 1/2 dozen new potatoes
Directions:
Preheat the oven to 400ºF.
Lay the chicken, breast side up, in a roasting pan.
Squeeze the lemon over the chicken, getting the juice on and around the bird - throw the halves into the pan, along with the peeled garlic.
Liberally salt and pepper the chicken and drizzle with enough olive oil to coat - about 3 Tbsp.
Top with sprigs of herbs.
Arrange the potatoes around the chicken, and drizzle with another 3 Tbsp. of olive oil, sprinkle with salt and pepper.
Cover and roast in oven for 20 minutes, remove foil and roast another 45 minutes or so, or until the chicken is browned and the juices run clear.
Source: Adapted from goop.com
Monday, July 4, 2011
Cake Pops

I had really been wanting to try my hand at making cake pops for a while now, what with my ravenous, incurable sweet tooth and all. I was intimidated; it looked super time consuming and adding a toddler into the mix and being hugely pregnant, I just didn't think cake pops would be in the stars for me for a few years. I also thought that even with my love for sugar that they might be over the top in the sweet department; I have had Starbuck's cake pops and pretty much had to pace myself over an entire day to finish just one because it was so sweet.
Alas, mom-in-law's birthday rolled around and Janelle had the idea to make cake pops, so I told her that I HAD to be involved and that she HAD to let me blog about it. Being the nice gal that she is, she let me do both and we had a great time! It took us 3 hours, mind you, but doing it with someone didn't make it feel that long and we had a blast doing it! I took lots of pictures to remember what we did - although there are a ton of great websites out there that have great photos too! It was a huge success and they were super yummy, and didn't have an inch of coating on them like all the other Cake Pops I have seen! The basic instructions are below.
Cake Pops:
You will need: 1 boxed cake mix, 1 container frosting, melting wafers (we used white and milk chocolate and dyed the white with food coloring), shortening, lollipop sticks
Method:
* Bake a cake, any cake! (We opted for a store bought vanilla cake, and a brownie mix; you can make any cake you like. We went the boxed route for ease and time, and also because you need a cake that comes out perfectly moist, but not too moist.)
* Let the cake cool, and then mash with a fork
* Mix approx 1/3 of a container of store bought frosting into the cake (we opted for cream cheese frosting because it is slightly less sickengly sweet); the frosting allows you to roll the cake into balls, add more frosting if it isn't coming together. For the brownie, we didn't need to add frosting because it can be rolled into balls without it.
* Roll the cake dough into balls of the same size (a pampered chef cookie scoop does a perfect job!)
* Melt wafers with about a tablespoon of shortening (approx 1.5 cups wafers:1 Tbsp shortening); you can opt not to use the shortening but we highly recommend it; it means that the coating won't be super thick, and putting it onto the cake pop will be much easier.
* Dip sticks into warm wafer mixture and position into the cake balls. Allow to cool.
* Dip cake balls into the wafer mixture (if you have trouble coating it, heat it up again), and then shake or twist off excess over the pan/bowl. Put lollipop sticks into floral foam or styrofoam to dry. Sprinkle with decorations! Eat!


Sunday, June 26, 2011
Real Strawberry Cake (from scratch!)
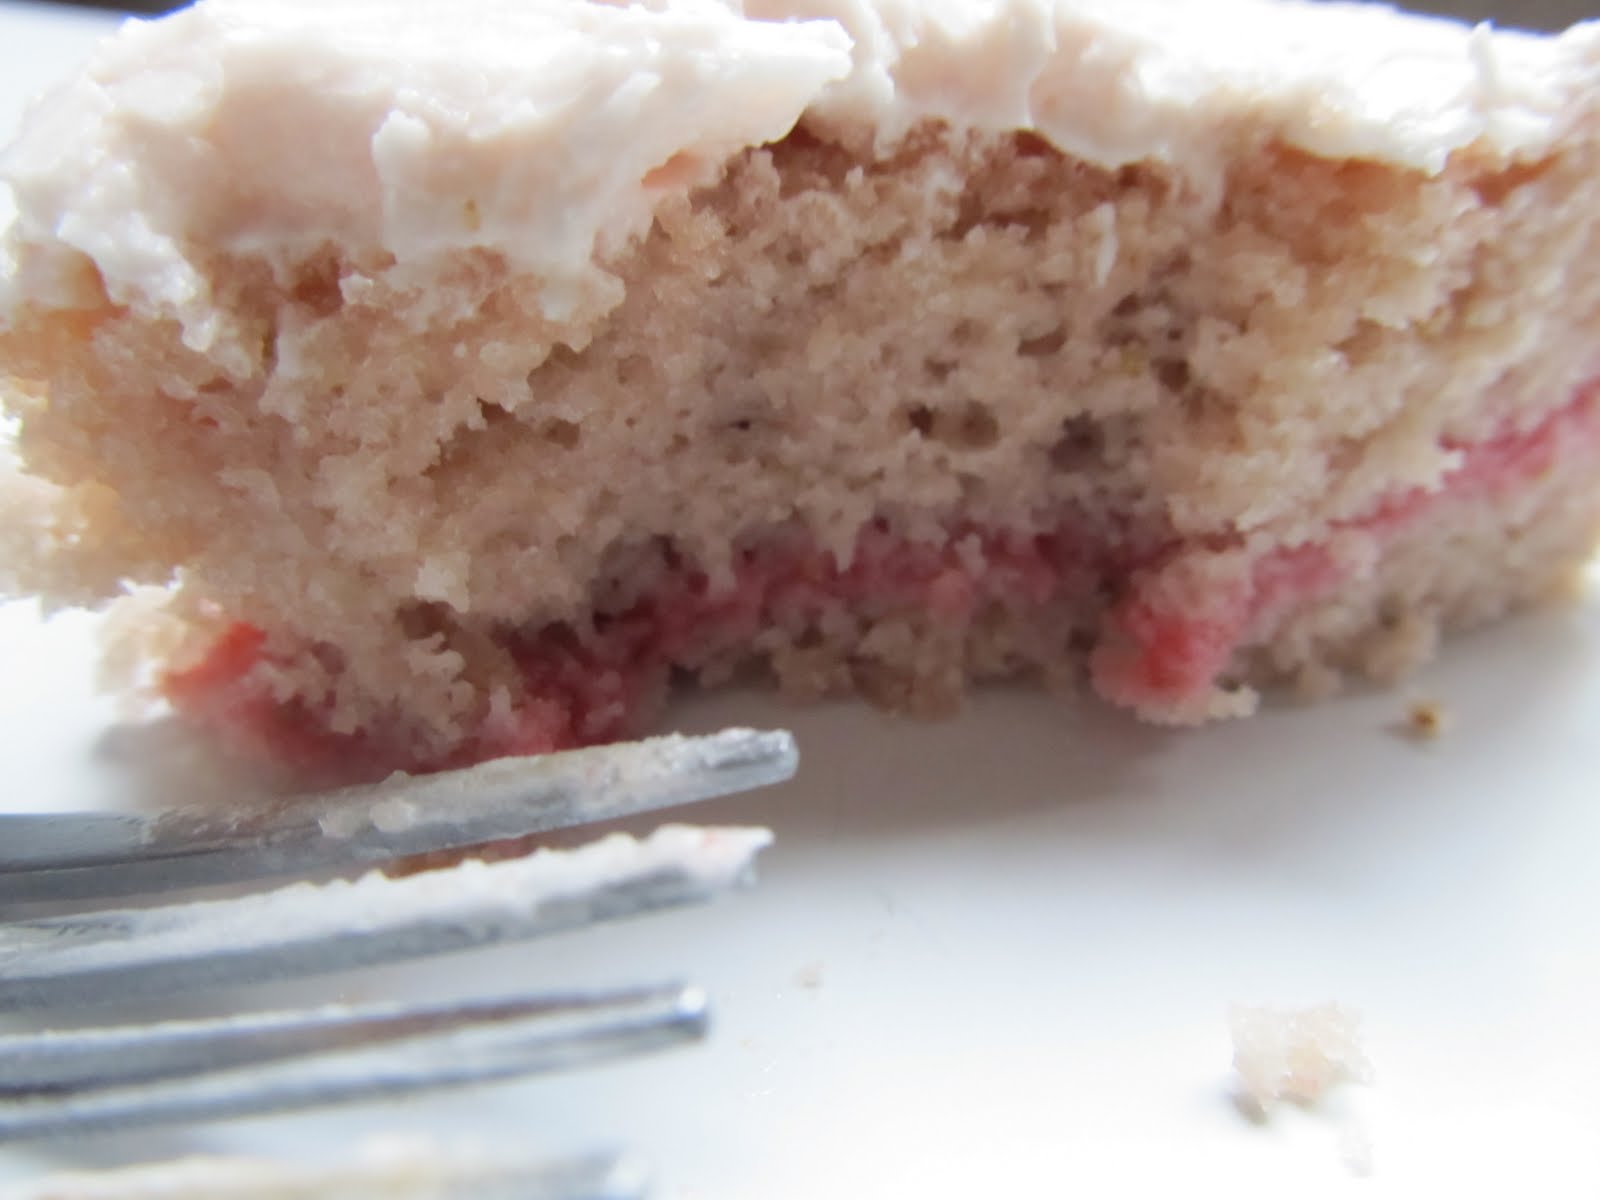
This was good - I mean, really, really good! You would be amazed at all the Strawberry Cake recipes out there that call for jello, or flavoring & red dye number 9.
This is the real deal; nothing fake in this baby, and all the strawberry flavor relies on is - get this -strawberries! I made this a few weeks ago before our local strawberries were even ready and I plan to make it again after I buy a plethora of flats from our local berry farm. Hubby hates cake, and he actually ate quite a bit of this (albeit secretly)!
I didn't know how this would turn out, so I made only half the recipe the first time and put some of the strawberry puree as a filling between the layer that I sliced into the cake. Definitley do NOT leave out the puree in the middle of the cake; it gives it a slight tangy-ness that would otherwise be a too sweet cake that leaves your teeth a bit sore, but with the puree in the middle, it was perfect!
Real Strawberry Cake|Makes 2 - 8" pans
3 cups frozen or very ripe fresh strawberries, hulled (if frozen, thawed)
1-2 tsp sugar (optional)
1/4 cup milk, at room temperature
4 eggs
1 Tbsp vanilla extract
2 1/4 cup cake flour, sifted
1 3/4 cup sugar
4 tsp baking powder
1 tsp salt
3/4 cup butter, softened (not melted)
Preheat oven to 350 degrees and grease two 8 inch pans.
In a small bowl, combine puree, milk, egg, and vanilla and mix with fork until well blended. In bowl of mixer, add sifted flour, sugar, baking powder and salt and mix to combine. Continue beating at slow speed and add butter. Mix until combined and resembling moist crumbs.
Add liquids and beat at medium speed for about 1 minute or until full and evenly combined.
Bake for about 25 minutes or until a toothpick inserted in the center comes out clean (time will vary). Let cakes rest in pan for about 10 minutes and turn out onto wire racks. Let cakes cool completely (about 2 hours).
Strawberry Frosting
3 cups icing sugar
1.5 cups butter
3 tsp vanilla
Strawberry puree (and extra icing sugar if needed)
Cream butter, and slowly add icing sugar. Combine with vanilla and slowly add desired amount of reserved strawberry puree (this will depend on how pink you want it and how "strawberry-ey" you want it! Add extra icing sugar 1 Tbsp at a time until desired consistancy is reached. Whip for about 5-6 minutes until light and fluffy.
Source: Cake - http://www.jasonandshawnda.com/ (Confections of a Foodie Bride), adapted from Cook's Illustrated Classic White Cake and Good Things Catered. Frosting - BakingFetish original.
Monday, June 20, 2011
Grilled (yes grilled!) Chicken Cordon Bleu

If you are already in summer mode, despite our weather, I would highly recommend making these for dinner - maybe tomorrow, which marks the first day of summer! Growing up my mom would make Chicken Cordon Bleu every once in a while and I LOVED it! What could be better than chicken and ham pretty much covered in a gooey, cheesy mess?!? Although, if you know my mother, you know that nothing she does is ever a mess, so chicken cordon bleu was always a very unmessy affair in our house! I can't say the same for these, or maybe it is just my method, but grilling them on the BBQ does mean that a little mess is par for the course.
Cooking these on the BBQ, rather than in the oven, or frying them, gives them this great flavor, and it pretty much means I will never be able to eat regular cordon bleu ever again. Oh well, I usually drag the BBQ out during the middle of winter anyway!
Grilled Chicken Cordon Bleu
(to make the recipe easier to follow, I have reduced it to one portion, that way you know how many of each item to buy, rather than by weight, as in the original recipe)
1 Chicken breast
1 slice deli ham
1 slice swiss cheese (PC has a great package of sliced swiss cheese in their deli that is the perfect size)
Dijon mustard
Salt & Pepper
Cut a pocket in the centre of each breast, careful not to go all the way through.
Roll swiss cheese into a cylinder and then roll inside of ham slice.
Stuff inside the centre cut of the chicken breast.
Roll the breast around the ham and swiss, using toothpicks to ensure it stays closed. (I use a ton of toothpicks... usually about 6 to make sure it holds).
Brush with dijon and sprinkle with salt and pepper.
Throw onto your preheated and oil brushed grill at high heat to sear, and then lower to grill slowly, ensuring that the chicken is cooked all the way to the centre.
For the Vinaigrette: (you may be tempted to skip this, but I beg you, please don't!)
2 Tbsp white wine vinegar
1 Tbsp dijon
1 Tbsp honey
1 Tbsp lemon juice
2 Tbsp olive oil
Minced fresh parsley
Salt and pepper
Whisk ingredients together in a bowl until combined, once chicken is done, drizzle sparingly to cover top of chicken.
You WILL enjoy this! I have made it twice in the last 2 weeks!
Source: Pink Parsley, from Cuisine Grilling
My project for this week: Homemade Oreos! (The only good thing about the lousy weather: we can still turn on the oven!)
Sunday, June 12, 2011
Best Pancakes

In honor of Father's Day next weekend, why not whip up a batch of light and fluffy pancakes for the Dad in your life? Of course, because we always have strawberries in the house, I love to top mine with a whole bunch of them, but choose whatever he likes; these fluffy babies will taste great with any topping! Throw in a dash of cinnamon, or a bit of almond extract, maybe some melted chocolate after you pour the batter in the pan and swirl it through - these pancakes are a favorite here and they are my go-to when it has been a long day and I don't have time or energy to make dinner!
Fluffy pancakes|(yield 5-6 med/large pancakes)
1 cup flour (you can use white, whole wheat or a combination)
1 Tbsp sugar
1 heaping Tbsp baking powder
1/2 tsp salt
1 egg
1 cup milk
2 Tbsp vegetable oil
Whisk together the dry ingredients, create a well in the centre & add wet. Stir until combined and let sit for a few minutes before scooping onto grill or frying pan; this give the baking powder time to do its "fluffening" magic!
Source: Nicole original, adapted from allrecipes.com
Thursday, June 9, 2011
So many recipes, so little time...

Two posts in one week! I must be bored! Actually, hubby is away and I have to admit, I am kind of lonely when baby girl goes to bed. What to do, what to do, but sit at the computer with all my good friends; foodie blogs!
It has kind of felt a bit like summer here in our little corner of the west coast for the last few days and that has got me thinking about what I am now referring to as my Summer Foodie Bucket List. Most of it revolves around strawberries, as I am pretty convinced that fresh, local strawberries are probably God's greatest foodie gift! I have so many recipes stockpiled already that I need to blog about, but I control myself because I know if I do them all at once, a) they won't get read or used because there will be too many and b) I won't have anything left to recommend in a few short months as I am convinced that after baby number 2 arrives, I probably won't be doing any crazy kitchen experiments for some time! (Unless of course, this child arrives with a brand new kitchenaid mixer in his or her hand.)
I just stumbled upon a "From Scratch Strawberry Cake" recipe that has amazing reviews, which I shall attempt and then blog about my success or failure, but I am hoping for the former. I am also thinking Strawberry Margaritas, Strawberry Cream Cheese Tart, Strawberry Margarita Popsicles, Strawberry Scones, and the list goes on. However, if you are not a strawberry fanatic like me, I will also attempt to woo you with Tropical Fruit Sorbet (which will require an ice cream maker, which I hope to get for my summer birthday, hint hint hubby), Grilled Chicken Fajitas (which I hope to make tomorrow night), along with homemade Pina Coladas, a Blueberry Boy Bait Cake with family grown blueberries, Grilled Chicken Cordon Bleu (which I have already made and will post about soon because you will think you have died and gone to heaven when you take that first bite!), and finally a homemade Teriyaki sauce to use on a grilled meat of your choice to which I recommend Smashed New Potatos! I promise to post all these recipes during the summer months so that you can enjoy them too.
Anything on your Summer Foodie Bucket List?
Sunday, June 5, 2011
Grilled Bruschetta

So now that it looks like summer weather might be upon us (fingers crossed!) I have been looking for simple, lighter recipes for the warmer weather. I happened upon this little gem at one of my favorite sites, the Pink Parsley blog. This recipe is from Ina Garten, who I am big fan of because she is big on cooking in season and using fresh, simple ingredients that mean big flavor! This recipe really couldn't get easier and it was so yummy; even hubby, who has a hate-hate relationship with carbs, gobbled these up. (He then promptly asked me not to make them again because he would eat too many!)
I served these babies with a spinach salad and it was the perfect warm weather meal; you even prepare them on the barbecue, so there is no oven to turn on and sweat over, and it means your house won't have to be hotter than hades after making a meal! Yay! So, without further ado, here is Pink Parsley's adaption of Ina's Grilled Bruschetta with Prosciutto & Mozzarella (from The Barefoot Contessa, How Easy is That?)
Grilled Bruschetta with Prosciutto & Mozzarella
6-8 slices French Baguette (sliced about 3/4" thick)
1 garlic clove, cut in half
Olive Oil
60 grams sliced Prosciutto
Grated Mozzarella
Fresh herbs: I sprinkled these with basil & parsley
Pepper to taste
Make sure barbecue grates are clean, brush with oil and bring to medium-high heat.
Brush one side of each bread slice with olive oil and grill, oil side down, until toasted.
Remove from grill and when decently cool rub the grilled side with the cut garlic. (The more you rub, the more bite it will have.)
Place torn prosciutto and mozzarella on top.
Return to grill (if you have a top rack, this is best) and cook until cheese is melted.
Sprinkle with fresh herbs and pepper.
Enjoy!
Sunday, May 29, 2011
The Green Monster

Several weeks later I realized that I was in for it because my 20 month old daughter pretty much screams whenever she sees something of a vegetable hue. I decided I would make the smoothie and even add the spinach to it, and she could drink it. I made the mistake of letting her see the color before I tried to coerce her into drinking it. (Which she never did, by the way.) I hate letting things go to waste, so I sucked up my vegetable pride and took a hesitant sip. It was actually quite delish! I have since made several adjustments to it and now find it quite delectable. So, if you are like me, and find your skin becoming whiter and whiter for lack of vegetable pigment, drink up! I promise you, I actually enjoy these things - which is saying a lot, coming from me!
Nic's Hate Veggies Smoothie (Makes 1 serving)
1/3 banana
1/3 cup frozen pineapple (I also used mango when pineapple wasn't available)
1/3 pear, coarsley chopped
1/3 + 1/4 cup orange juice
1/4 heaping cup yogurt - flavor of your choice (I used peach)
5 ice cubes
Small handful of spinach leaves
1 Tbsp. ground flax
Combine all ingredients in blender or Magic Bullet and pulse until completley smooth.
It looks so gross, but is soooo good!
Source: adapted from Annie's Eats
Sunday, May 22, 2011
Chicken, Pesto & Parmasan Pizza

because really, who does not love pizza? I have become quite an avid Annie's Eats follower, as you probably know, and I came across the picture of a pizza that she had made, complete with chicken, homemade pesto and roasted tomatoes from her garden. I started drooling immediatley and knew I HAD to make it. I made it exactly as the recipe stated the first time around, and it was okay. I found it lacked a good amount of flavor, so the second time I made my own pesto recipe that I have adapted from the back of a package of President's Choice basil, used a TON of parmasan cheese and only a little bit of mozzarella, and threw in not only tomatoes, but spinach leaves and mushrooms as well. It was divine. Between hubby & myself, and little kiddo who doesn't really count because she abhors eating (although, she did eat an entire piece of this!) we polished off the whole thing in one dinner.
The dough is from Annie's Perfect Pizza Dough, and it is lovely; plus if you have a stand mixer it takes about 30 seconds of effort. Not bad, especially if you have a little munchkin or munchkins hanging off your leg and attempting to shimmy up your body every time you try and prepare a meal! The recipes look time intensive, but they aren't; making the pesto is what takes time, and I love shortcuts, so would buy it in a package, but being allergic to nuts means I am destined to always make my own.
Annie's Perfect Pizza Crust Dough|Makes roughly 2 crusts
1/2 cup warm water
2 1/4 tsp instant yeast (or one packet)
1 1/4 cups water, room temperature
2 tbsp olive oil
4 cups flour (you can use either whole wheat or all purpose - I usually do half and half and it is great!)
1 1/2 tsp salt
Sprinkle yeast into the warm water (in a larger measuring cup) for approx. 5 minutes until yeast is dissolved.
Add room temperature water and oil, stir to combine.
Place the flour and salt into the bowl of a stand mixer and give it a good mix at low speed, with the paddle, until combined.
Slowly add the wet ingredients and mix at low speed until it forms a cohesive ball of dough.
Replace the paddle with the dough hook, and mix on low for about 5 minutes.
Form the dough into a ball and put into a well oiled large bowl bowl; cover with plastic wrap.
Let rise for 1.5-2 hours, punch the dough to deflate, divide into 2 and make your pizza(s)!
Chicken, Pesto & Parmasan pizza
1/2 batch of pizza dough
Basil pesto (you can buy premade, or make your own; President's Choice has a great recipe on the back of their 28g package of Basil... which I would share, but don't have!)
Shredded parmasan cheese
A small amount of shredded mozzarella cheese
Grilled chicken (I usually use about 1 breast)
Cherry tomatoes (cut in half or thirds)
Handful of spinach
Handful of mushrooms
Salt and pepper, to taste
Preheat oven to 400.
Roll out dough onto a pizza stone.
Spread with basil pesto.
Load on the cheese.
Top with remaining ingredients, and season with salt and pepper.
Bake about 15 minutes, until cheese is bubbly and crust is lightly browned; let cool for 5 minutes to ease cutting.
Source: Pizza crust from Annie's Eats; adapted from Baking Illustrated
Sunday, May 15, 2011
Celebrating Chocolate Chip Cookie Day!

In honor of National Chocolate Chip Cookie Day, I am back. I have actually been at it for a while, reviewing recipes, taking photos, making my family eat failures and accomplishments alike! So, because of this wonderful day where we recognize the impact that Chocolate Chip Cookies have had on our lives, I decided that is what I would start with. I have been quite an Annie's Eats fan for some time now, and she was the one who actually brought this day to my attention, and because of that, I decided I would make her all time favorite CCC recipe. It was delicious. I have reviewed quite a few of her recipes as of late and some have worked, and some, well, not so much. I will post about what NOT to make later.
My best friend, also known as Kitchenaid Stand Mixer, went on the fritz about 2 weeks ago and I had to send it back. I have yet to get my new one and am about to start a protest, so I had to use my hand mixer for these. Normally that is fine, but mine has an exceptional quality that involves blasting the flour all over the kitchen if you hold it at the wrong angle. For some reason I always forget about aforementioned quality, I should take a picture of the damage one of these days.
Anyways, on to bigger and better things. My goal is to review a recipe a week, and to also share my failures - what if you attempt to make the dud of a recipe that I just did, and I could have saved you from all the work and money? I have also decided that when I post recipes I will ALWAYS put them in Canadian measurments. This has become my new pet peeve: happening upon recipes that have multiple styles of measurment which involves a half hour google search to figure out what it all means.
So without further ado, here is Annie's recipe.
Thick and Chewy Chocolate Chip Cookies:
2 cups + 2 tbsp all purpose flour1/2 tsp baking soda
1/2 tsp salt
3/4 cup butter - melted and cooled
1 cup packed brown sugar
1/2 cup granulated sugar
1 large egg + 1 egg yolk
2 tsp vanilla extract
1 1/2 cups semi sweet chocolate chips
Preheat oven to 375.
Whisk first 3 ingredients together, set aside.
Mix together butter and sugars until combined. Beat in egg, yolk & vanilla.
Add dry ingredients and mix JUST until combined.
Stir in chocolate chips by hand.
I find cookies bake best on a stone, so use this if you can. Bake at 375 for 11 minutes or so.
Enjoy, because I know you will!
Source: annieseats.com, adapted from Blonde Ambition in the Kitchen, originally from Baking Illustrated
Next up: Pesto, Chicken & Parmasan Pizza
Subscribe to:
Comments (Atom)